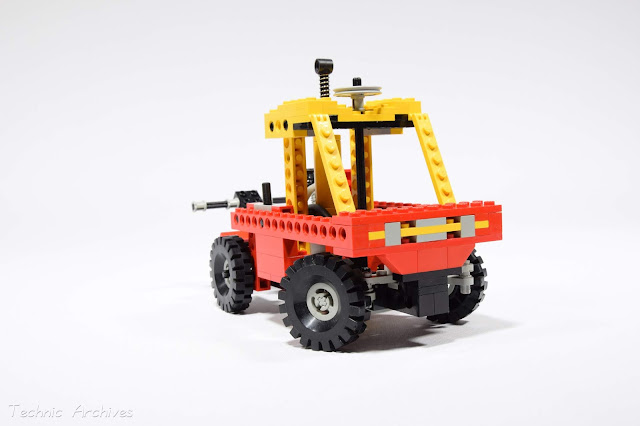
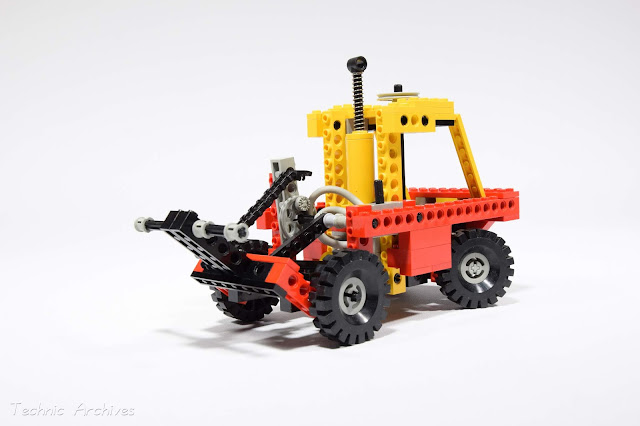
The Expert Builder sets, released in 1977, brought a radical change by the release of gears in the Lego world, but innovation hasn't stopped there. Lego always tried to enhance the basic idea of stacking blocks on top of each other. One remarkable result of this desire to improve was the pneumatic system (using pressurised air), which first hit the shelves in 1984. Lego was so confident in the new system, that 3 out of the 4 sets released in that year contained pneumatic parts. Evidently it worked out, as pneumatics are still in production today, but not exactly in the same form as they were when first released.
The first generation pneumatic system was rather short lived, only featured in 4 sets in total, 3 of which was released in the first year it was introduced.
It works like this: there is a pump which provides the pressurised air, and it's connected via rubber tubes, through valves, to one or more pneumatic cylinders.
The pump has a single outlet, which - in the first generation - blows air out when the piston is pushed down, and sucks air in through it’s outlet when the piston is pulled out.
In other words it can provide both pressurised air and vacuum. The pneumatic cylinder also has a single port. If air goes in, the piston rises, if air is sucked out of the cylinder, then the piston retracts.
In order to use this system, two other components are needed: a distribution block, which looks like a regular 2x4 Lego brick, but it has 3 pneumatic ports.
It has 2 inlet ports with one way valves, one of which only lets air in, and the other only lets air out. There is an outlet, which lets air flow in both directions.
There is also a switching valve, with also 3 ports and a 3 way switch. Either both of the inlets are closed, or either one of the two inlets is connected to the outlet.
It might look complicated at first, but how the whole thing works is rather simple: the pump is connected to the distributor block, which basically separates pressurised air and vacuum. If the pump is constantly worked, then there will be a steady outflow of air on one outlet of the distributor block and constant vacuum on the other. These outlets are connected to the switch valve inlets, and it's outlet is to the pneumatic cylinder. If the switch lets through pressurised air, then the cylinder piston rises up. If the switch it lets vacuum through, then air is sucked out from the cylinder and the piston retracts.
In practice, if the structure moved by the cylinder is heavy, then it's weight will push the piston back. On the other hand, if it's something light, then the performance of the system is greatly influenced by the atmospheric pressure, as lower air pressure has less force to push the piston back into the cylinder. Kids living in higher elevation could enjoy their pneumatic models less than kids living in lowlands.
Solving this problem meant the end of the first generation pneumatics: the engineers at Lego redesigned the cylinder to have two inlet ports. This way the piston is pushed by pressurised air in both directions and vacuum is not used at all. With this change, the distributor block become obsolete, and also tubing became somewhat simplified, or at least easier to follow. This second generation pneumatics are here with us to this day, only the connection points are changed when Technic transferred from the studded building style to studless.
set number:8843
number of pieces: 270
release date: 1984
Assembly and functions
This forklift truck is unique because, to this day, this is the only forklift to employ pneumatics. The very first forklift truck was released in the Expert Builder era, in 1977. It's fork is lifted by gears and gear racks.
The building instructions - according to their age - are not overly detailed, but somewhat are more tame than of the sets of the late 70-es. It is still easy to misplace a brick though, which can lead to force you to disassemble half the model. But it's apparent that great care was taken to make it obvious how to connect the pneumatics.
The fork is lifted by a single pneumatic cylinder to considerable height, compared to the scale of the model. It travels on twin "rails", made of two beams, which, in my opinion is a genuine idea. Upon building the model for the first time, it didn't work out for me, as the fork got stuck on it's "rails" when I wanted to lower it. After some examination and a few dis-assemblies I found out that one of the 1x2 Technic beams was not a genuine Lego made brick. It looked like a carbon copy of it, but it was actually a tad higher, which was enough to block the fork from going down. After replacing it, order was restored.
The fork can not only be raised, but tilted as well, in order to make it easier to pick up a pallet. In my opinion, it would have been better to cover the forks with tiles, as the studs make it hard to push the fork under something.
When building it for the first time, I've also noticed, that there isn't much room for the tubing: there is not much of it as there are only one cylinder, but space in the cab is confined.
The truck is steered by a "Hand of God" wheel, placed on the top of the cab, which in my opinion is a great invention, as is adds a lot of playability to the model.
Only the rear wheels are steered, as usual for a forklift truck.
Play value
Unfortunately, pneumatic fork lifting has a bad impact on playability: the piston likes to take a grip on the inner walls of the cylinder. The result is: you keep pumping and nothing happens. Then suddenly the piston goes to the fully extracted position in an instant. After some working of the cylinder this effect mostly goes away, luckily.
The pneumatic tubes are prone to get bent in exactly the same way, as the building instructions tells they should not. Mostly because of the length of the tubes and
the lack of space.
Upon lowering the fork, sometimes the chain wants to roll down on the wrong side of the cog, making the whole structure to stuck.
Steering is stiff, but not because of excessive use of bevel gears, but rather because tubing is pushed against the steering axle in the cab.
Despite all these problems the truck works if handled carefully, so it's not a display only model.
Model B
There are detailed building instructions for a tow truck as well, where the pneumatic cylinder raises the front axle of the car it is towing.
The truck has a very similar style, that of the dump truck from the 8040 set, and I thought that maybe the two will fit together. But I was wrong: the gauge of the dump truck is too wide.
I tried to find a car with approximately the same scale, released about the same time, for the video, but I could not. The most fitting was the car with a trailer from the set 8035, but that was released 2 years later.
Unfortunately C models were already gone in 1984. None featured neither on the box, nor in the building instructions, which, in my opinion is a pity.
Summary
The finished model looks really good, this is exactly how I imagine a forklift truck. The red and yellow color scheme gives it an industrial feel, and there is also something retro in there.
Attention to detail is really good, even the steering wheel of the cab is working, which is a very good touch, it makes the model more realistic. It’s impressive that this feature is implemented in such a small set.
I like this set very much: it was groundbreaking back then, as one of the very first pneumatic sets. It models the real thing quite well, but it takes away from the play value, that you don’t really want to stress the pneumatic elements, which are more than 30 years out of production. If they break, that’s a headache, and they will be more hard to find and more prone to break find as time passes.
It is indeed a collector’s item, as every other set featuring the first generation of Lego pneumatics.
Rare parts
Obviously the first generation pneumatic parts are rare, but they are not impossible to replace. Yet. The more than 30 years old pieces are prone to break. The pump of this set broke on me while I was trying to take images for this post.
There was 4 variation of the pump: they were produced in red and yellow, and in a normal and long version. Curiously there are no different part numbers for the long and normal version, which makes replacing them even more difficult.
I’m not sure what material are the valves are made of in the distribution block, but they seems to last, as well as the tubes. This set, like almost every other released in the ‘80 and ‘90 features toothed half-bushes, and axle pin connectors, both types. Those break a lot, like basically every piece which has an axle connection (recent sets included too).
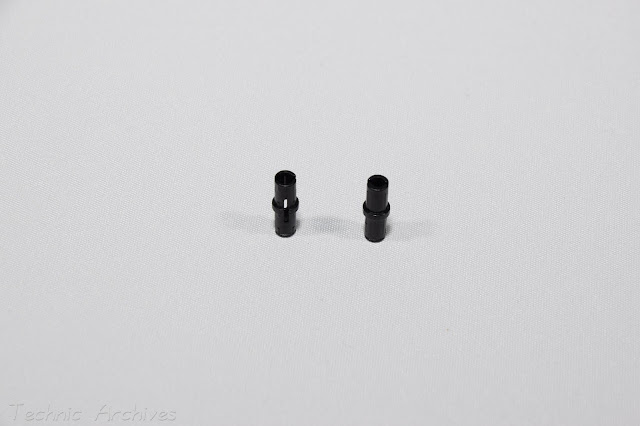
Lately I realised that even wheel hubs break. All four broke on this set while it was waiting on the top shelf to be photographed. Fortunately those are easy to replace. This set uses the old style friction pins, without a slot (show on the right). It holds onto the beam that it's almost impossible to remove. It's highly advised to replace them to the new version, to make disassembly easier.


Samedi 22 aout 2020 colis lego chariot elevateur jaune rouge
ReplyDeleteSamedi 22 aout 2020 colis lego chariot elevateur jaune rouge
ReplyDelete